
As a fair-skinned red head living in Australia, being sun smart in summer (and the other seasons!) is super important. What this often means is that any cute bathers I’ve ever owned has been covered up by a rash vest or t-shirt!
Last summer I made a rash guard that matched my bather (and my kids), but this meant multiple pieces of swimwear for each outing to the beach or pool (and more laundry!).
This year I was hoping for something a bit simpler and went on the search for long sleeved bathers. And after much scrolling of Instagram, I came across these beauties:
Project: Grace Rashie Suit
Designer: Swimstyle Patterns
Fabric: Med/heavy weight lycra from Pitt Trading
Notions: Swim lining from Remnant Warehouse, 16″ chunky open-ended zipper, small amount of medium weight interfacing (for zipper area) & woolly nylon thread
Size: Medium – graded to a Large at the hips (and length)
I wasn’t a huge fan of the ‘sewn on’ look of the open ended zipper, which is the standar approach in the pattern. However there is a free tutorial for inserting the zipper fully enclosed (more like a RTW style). It was reasonably straightforward to follow and resulted in a pretty nice finish. Admittedly, the black zip & black fabric are pretty forgiving of a little wonky stitching 🙂
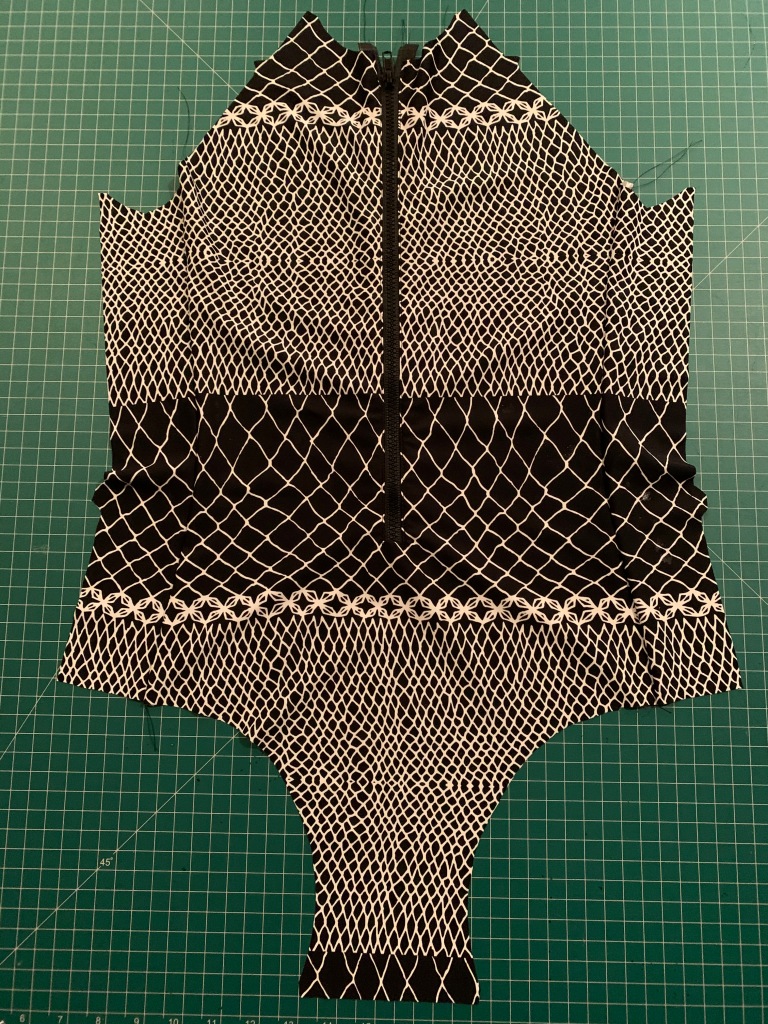
As most 80’s kids would have experienced, I have a bit of trauma around bathers that ‘go sheer’ half way through the summer. Yes, swim & lycra fabrics have come a long way since then, but at the moment I’m much more comfortable knowing my swimsuit is lined! I cut all the bodice pieces out of swim lining fabric and constructed it the same as the outer shell.
I wasn’t worried about lining the sleeves (and this seemed a bit too complicated anyway!) so before attaching the arms I inserted the lining into the outer shell, wrong sides facing and tacked them together at the leg holes and raglan arm sleeves. The sleeves then were attached – essentially to the outer & lining as if it were one layer of fabric. I handstitched the lining to the zipper tape on the inside (next time I would hold off the zipper top stitching until this point and then go through all layers to secure the lining):

At this point, I took a moment to admire the excellent pattern matching at the front & back. (Confession: I had to cut the sleeves “upside down” to fit them onto my fabric – so any pattern matching was a fluke. Doesn’t it look good though?!).

Inserting the elastic: The insertion of the rubber elastic was a bit of a headache (skipped stitches, nesting of thread) until I was given the tip to use a zig zag WHERE THE STITCH WIDTH & LENGTH ARE THE SAME. I don’t know who figured this out, but it resulted in perfect stitching for the rest of the elastic and I will be forever grateful!!!
I should mention – I did make one other adjustment to the paper pattern before I even started this project. From the look of the modelled photos here, it looked to me that the backside would be a bit too ‘cheeky’ for my body shape (and liking). In fact, the front & back pieces had almost the same shape. So – for the back piece, I traced over the shape of the Megan Nielsen Cottesloe swimsuit bottoms so that I would have more coverage. It added about 2cm either side. I’m very glad I made this alteration – the fit is great, but it definitely wouldn’t have fit me well at that point straight off the pattern.
The finished product:


Verdict:
I am delighted with this pattern! It was easy to follow and the fit is excellent!
Next time, I *may* increase the body length by about 1cm. It’s just sliiiiiightly too short, although definitely wearable. However, I’d like to see how the swimsuit holds up after some wear, as it’s possible it will stretch out and be perfect as is.
